Saturday, March 9, 2013

Spring Wreath


Supplies

Styrofoam circle wreath form
A variety of pastel yarns
Small pins
White ribbon


Directions
Measure equal sections around the wreath (mine are 2") and mark with permanent marker.


I had 8 different colors of yarn and 15 equal sections around the wreath (I used white yarn on the 15th section since that's the color ribbon I was using to hang the wreath)

Wrap each section with yarn and use a small pin to keep the yarn in place once the entire section is covered.


Fill entire wreath and tie a ribbon to display on your front door.


Tuesday, February 12, 2013

You are my SUNSHINE :)


This is my {current} inspiration room for our bedroom:


I love the framed art on the left night stand.  If you can't see it, its the words to the song "You are my sunshine."

Since we were snowed in this past weekend, I decided to make something similar to it for our bedroom but with supplies I already had:

Dark gray paint samples

Frame (from Michaels - originally bought for the kitchen)

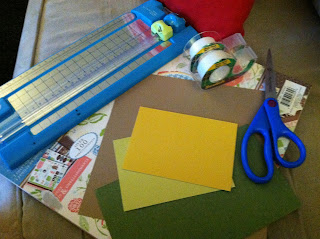
I had some left-over matting paper that I taped together (hey, whatever works!) to use as backing

Tissue paper

I found the You are my Sunshine print on pinterest (of course) (go here if you want to download your own).

Here it is! I love it!!

Monday, February 4, 2013

Whole Chicken Crock Pot Recipe


This was my first time cooking a whole chicken on my own.  I always thought of cooking a whole chicken as intimidating (maybe it was because of the giblets and other things..), but it turns out it is really easy!  

I cooked the chicken in the crock pot, and then roasted it in the oven for 30 mins.  

Ingredients
1 whole chicken
Chicken seasoning 
1 onion (I used a shallot)
2 tbsp minced garlic


Directions
1.  Dice onion and place on the bottom of the crock pot. 
2.  Take giblets out from inside the chicken and place chicken on top on onions in crock pot. 
3.  Cook on low 3 1/2- 4 1/2 hours. 
~
4.  Preheat oven to 425 degrees. 
5.  Take chicken out of crock pot and place in a baking pan. 
6.  Add vegetables - I added baby carrots and fingerlings potatoes. 
7.  Pour liquid from the crock pot over vegetables and chicken.  
8.  Place in over and bake for ~30 mins or until chicken is golden brown and juices run clear. 

Sunday, February 3, 2013

Blueberry Muffins


Due to a recent trip to Costco, we had an unusually large supply of blueberries in the house.  To make sure they didn't go to waste, I decided to try a new recipe for blueberry muffins.  I found this recipe on pinterest. I like it because you use applesauce (in place of oil/butter) and whole wheat flour AND they taste great!

RECIPE
Makes 18 muffins

Ingredients 
3/4 cup whole milk
1 egg
1/2 cup homemade applesauce
1 tsp homemade vanilla extract

1 cup all purpose flour
1 cup whole wheat flour
1/4 cup white sugar
1/4 cup light brown sugar
2 tsp cinnamon
3 tsp baking powder
1 tsp salt

1 generous cup fresh blueberries


                                                              homemade vanilla extract


Directions
1.  Preheat oven to 400 degrees.
2.  Line muffin pan with cupcake liners or spray the muffin pan with non-stick cooking spray. 
3.  In a small bowl, whisk milk, egg, applesaucevanilla extract.


4. In a medium sized bowl, mix flours, sugars, cinnamon, baking powder, and salt.


5. Make a well in the center of the dry ingredients.


6.  Pour wet ingredients into well.


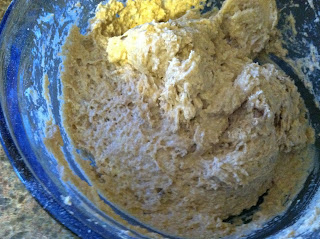
7.  Stir with a spoon until flour/sugar mixture is moist.


8.  Add blueberries. 


9.  Gently fold blueberries into muffin batter. 


10.  Spoon batter into muffin cups.  (I made 18 muffins with this recipe.)


11.  Bake for 18-20 minutes and remove from oven.


12.  Let muffins cool on wire rack. 


Enjoy!

Wednesday, January 30, 2013

Valentine's Day Wreath


Here is a simple and inexpensive way to make your own Valentine's Day wreath.

Supplies
Wire hanger
Red, pink or white tulle (I used ~1 1/2 rolls of this tulle for the wreath)
White, red or pink ribbon

Directions
Pull the wire hanger into either a circular or heart shape to form your wreath base.
Cut off the top of the hanger.
Cut tulle into ~6X7 inch pieces.
Tie a piece of tool to the wire hanger and tie a second piece directly on top.


Fold in half and pull piece to end of wreath. (Line all of the knots up on the back side of the wreath to make the front fuller.)
Continue until entire wire hanger is full.
Tie a long piece of ribbon to the top of the wreath.

And that's it! I love how ours came out...

Monday, January 28, 2013

What to do with all those cute family photo Christmas cards?


We get a lot of family & friend photo Christmas cards that I have been saving for several years.  I found a really cute way to keep these cards organized on pinterest - take all of the cards you want to save, punch a hole in the upper left hand corner and tie the cards together with a ribbon.  What a great idea!

I organized by year and started with 2012 (since I still hadn't put them away from Christmas!).  I used one of my favorite cards as a cover, cut out a few snowflakes, and wrote the year.  We plan to put them out with the Christmas decorations next year (with the rest of the cards I saved that I will eventually get to organizing...).

Tuesday, January 22, 2013

Travel Memento & Photo Collage

This turned out to be a great way to display small mementos and pictures of our travels in the house!


I have been saving pictures, postcards, tickets, $$, etc from my international work trips and our vacations with the intention of creating a travel scrapbook.

Then we got this great picture collage frame for Christmas (thank you!!!!) and I thought it would be a nice way to display some of the things we have collected over the past couple of years.

First I went through everything we saved, chose some favorites and laid them out in the collage pattern.


I cut everything to fit in the layout, and used scrapbook paper to fill in any holes our pictures, maps, tickets, etc did not cover.


I used the photo paper that came with the frame as the layout template and taped everything to it. 


Once everything was attached to the paper, I put the rest of the frame together. 


Here it is! I love it!!