Wednesday, January 30, 2013

Valentine's Day Wreath


Here is a simple and inexpensive way to make your own Valentine's Day wreath.

Supplies
Wire hanger
Red, pink or white tulle (I used ~1 1/2 rolls of this tulle for the wreath)
White, red or pink ribbon

Directions
Pull the wire hanger into either a circular or heart shape to form your wreath base.
Cut off the top of the hanger.
Cut tulle into ~6X7 inch pieces.
Tie a piece of tool to the wire hanger and tie a second piece directly on top.


Fold in half and pull piece to end of wreath. (Line all of the knots up on the back side of the wreath to make the front fuller.)
Continue until entire wire hanger is full.
Tie a long piece of ribbon to the top of the wreath.

And that's it! I love how ours came out...

Monday, January 28, 2013

What to do with all those cute family photo Christmas cards?


We get a lot of family & friend photo Christmas cards that I have been saving for several years.  I found a really cute way to keep these cards organized on pinterest - take all of the cards you want to save, punch a hole in the upper left hand corner and tie the cards together with a ribbon.  What a great idea!

I organized by year and started with 2012 (since I still hadn't put them away from Christmas!).  I used one of my favorite cards as a cover, cut out a few snowflakes, and wrote the year.  We plan to put them out with the Christmas decorations next year (with the rest of the cards I saved that I will eventually get to organizing...).

Tuesday, January 22, 2013

Travel Memento & Photo Collage

This turned out to be a great way to display small mementos and pictures of our travels in the house!


I have been saving pictures, postcards, tickets, $$, etc from my international work trips and our vacations with the intention of creating a travel scrapbook.

Then we got this great picture collage frame for Christmas (thank you!!!!) and I thought it would be a nice way to display some of the things we have collected over the past couple of years.

First I went through everything we saved, chose some favorites and laid them out in the collage pattern.


I cut everything to fit in the layout, and used scrapbook paper to fill in any holes our pictures, maps, tickets, etc did not cover.


I used the photo paper that came with the frame as the layout template and taped everything to it. 


Once everything was attached to the paper, I put the rest of the frame together. 


Here it is! I love it!! 

Monday, January 21, 2013

Crock Pot BBQ Chicken

We made this for dinner Sunday night - I wanted to try out this different way of using the crock pot I found on pinterest.  I read here about using foil to keep foods separate in the crock pot but cooking at the same time. (I always thought your only option in a crock pot was porridge-like substances!)

The chicken and potatoes tasted great!! We will definitely use this trick again!!


Recipe:

Ingredients
bbq chicken
2 bone-in chicken breasts
chicken stock
salt/seasoning for chicken
bbq sauce

potatoes
foil
chicken stock
salt seasoning
butter
(add your favorite vegetables too)

Directions
  1. Place chicken breast in the crock pot
  2. Fill the crock pot with chicken stock so it is covered about 1"
  3. Season the chicken with salt & seasonings
  4. Cover chicken with bbq sauce
  5. Cook on low for ~2.5 hours
  6. Create a small foil tray for the potatoes 
  7. Cut yukon potatoes into pieces and place in foil try
  8. Cover with salt seasoning and a small amount of butter
  9. Move bbq chicken to one side of the crock pot and place in the foil tray with potatoes
  10. Continue to cook on low for ~3 hours


Tuesday, January 15, 2013

Baked Chicken with Avocado and Mozzarella


Ingredients
2-4 Boneless chicken breasts
1/2 to 1 cup chicken stock
1-2 tbsp EVOO (Extra Virgin Olive Oil)
Salt seasoning
2 avocados, cut in slices
3 Tomatoes, cut into slices
1-8oz package of fresh Mozzarella, cut into thin slices

Directions
  1. Preheat over to 350 degrees. 
  2. Place boneless chicken breasts in large baking pan. 
  3. Pour chicken stock over the chicken breasts, make sure there is a thin layer of liquid covering the pan. 
  4. Rub top of chicken breasts with EVOO.
  5. Season with your favorite seasoning (we have been using this stuff called "magique" - Tom got some as samples from work).
  6. Cover with foil and bake at 350 degrees for 20 minutes. 
  7. Remove foil and bake for an additional 15 minutes. 
  8. Remove from oven.
  9. Top with sliced tomatoes, sliced avocado, then the sliced Mozzarella. 
  10. Return to the oven and bake uncovered until cheese melts.
  11. Serve with your favorite sides, we chose tricolored quinoa and roasted vegetables.


Roasted Veggies: 


Monday, January 14, 2013

Crock Pot Applesauce


You can make your own applesauce in a crock pot.  So easy, tastes great, and its homemade!!

Ingredients
1/3 to 1/2 cup pure cane sugar
8 - 10 large apples, peeled, cored and cut into slices or chunks
1/2 cinnamon stick
1/3 cup of apple cider or water

Directions

  1. Place all ingredients in crock pot.  Cook on: 
    Low - 8-10 hours
    High - 3-4 hours
  2. Stir occasionally. 
  3. Once your applesauce is finished cooking in the crock pot, turn off and let cool. 
  4. Remove cinnamon stick. 
  5. Place applesauce in blender. 
  6. Store in the refrigerator for up to one week.  
You can also can and freeze this recipe. 

I have used also this applesauce as a replacement for butter and oil in bread, cakes, and pound cake recipes. Works great!!


Thursday, January 10, 2013

Dresser Renovation & Creative Closet Space


This year, we moved into a home with about double the square footage of our previous two bedroom apartment.  We needed lots of furniture to fill all the extra space! 

Unfortunately, the closet space is minimal and there was no way my clothes were going to fit in the one small closet in our bedroom.  Since we have an extra (small) bedroom, we decided to use it as my closet (yay!) (we would also like to be able to use it as a guest bedroom by putting in a small pull-out sofa, but that's on hold for now).  

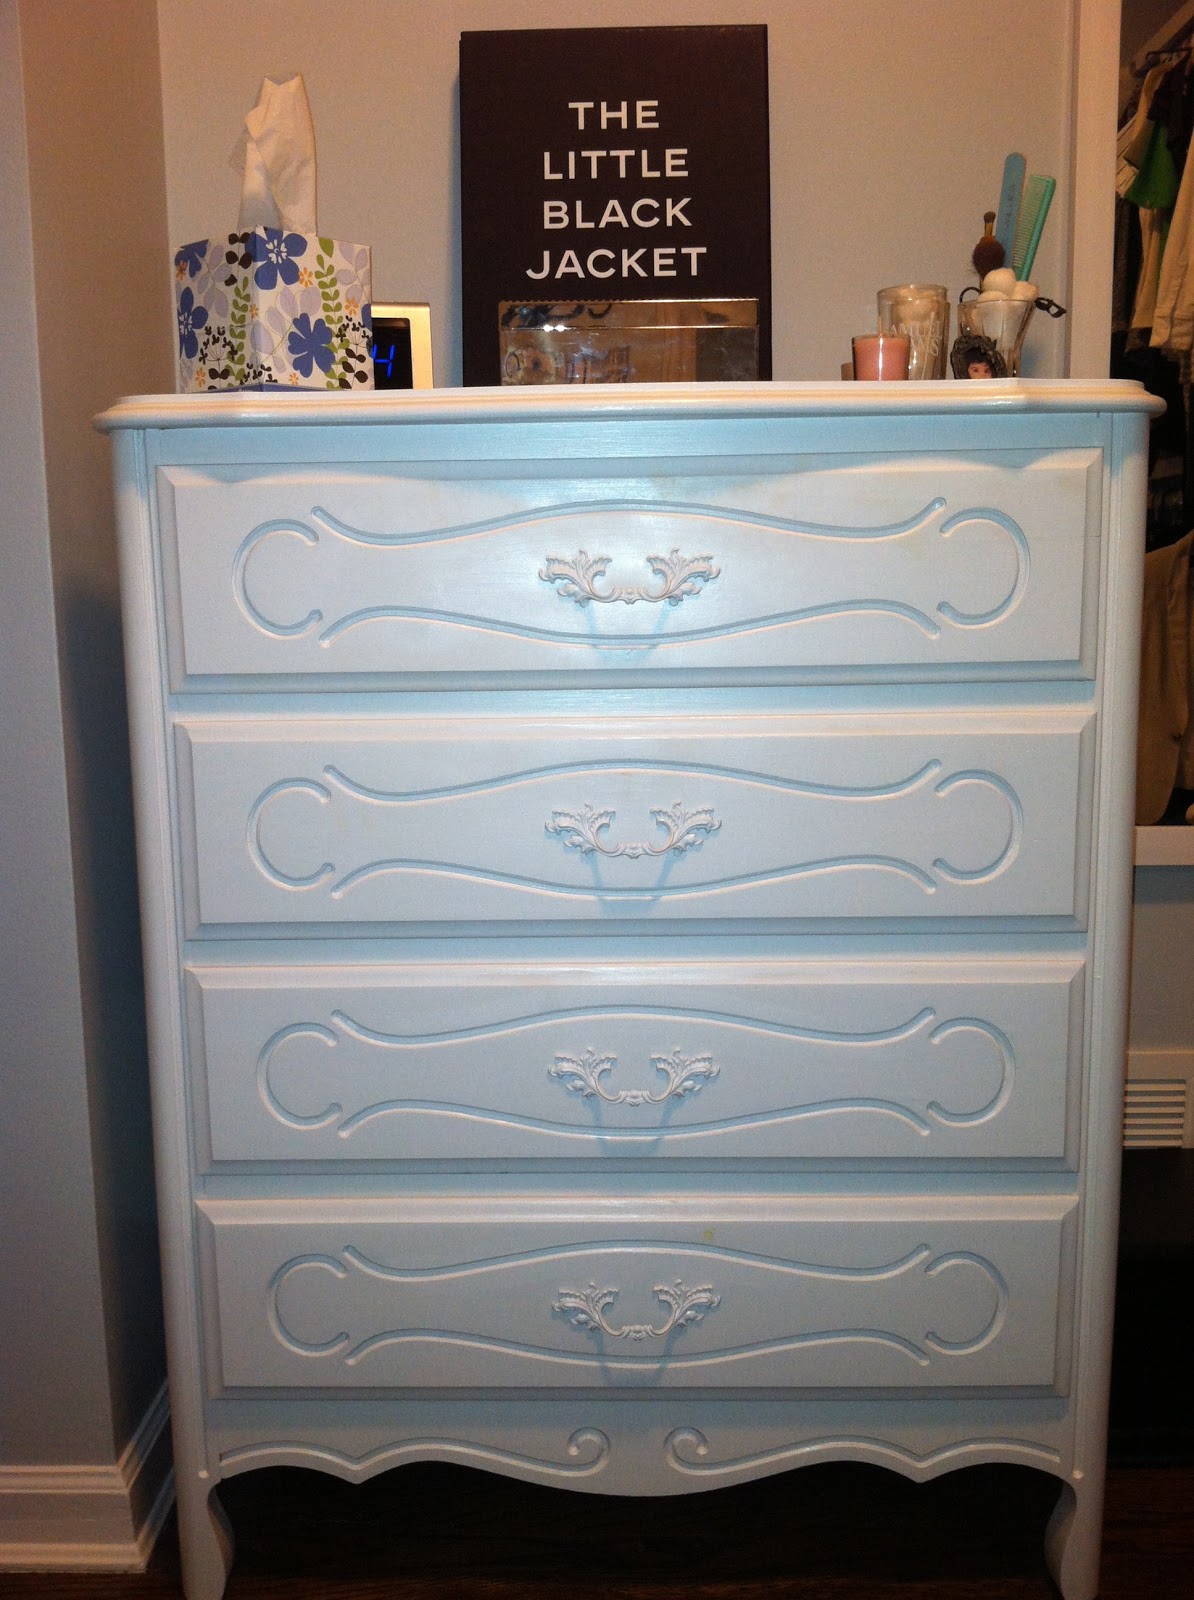
Tom found this dresser set at an estate sale two doors down from our house.  Let's just say I wasn't crazy about the dressers, but I didn't have anything else to put my clothes in when we moved and it was cheap. So, we decided to get them knowing we would have to do something to update the set. 

Once we took them home, I pulled all the drawers out and cleaned the dressers.


Next, I primed both dressers with oil-based white paint.  Wear gloves and keep your windows open!!!


Then I got a little lazy and bought a few cans of white spray paint, brought the primed drawers and handles outside, and spray painted.


I painted the base of the dressers with white paint we use on the woodwork. 


The finished products! I'm so happy with how they came out...


I have had this jewelry box and jewelry tree for a while but wanted to update them to better match my new room :)   I got a little crazy with the spray paint, bought some black and spray painted both.  I taped the glass part of the jewelry box with blue painters tape. 

They came out great and go perfectly in the room: 


Since the closet in the extra bedroom is super tiny as well we also decided to install a closet organizer on one of the walls in the room.  We found a wood organizer on groupon, cut it to the appropriate size, and spray painted (of course) all of the parts white.  Tom, my dad, and I (sort of) installed the organizer on the wall.  It gives me a ton of space for hanging clothes and my shoes! 


Now we just need that pull-out sofa and curtains!! 

Wednesday, January 9, 2013

Project Organization: Bathroom Closet


We recently spent one weekend beginning to update the bathroom - fresh coat of paint, new medicine cabinet, shower curtain, blinds, toilet seat, etc. At that time, we also decided to take the door off of the closet in our small bathroom.  When the door was open you couldn't get out of the bathroom and it just made the small space feel even smaller.  We also painted the closet interior, but did not take the time to organize everything in the closet so everything was just kind of thrown back in. 

Its been impossible to find anything - medicine, back-up toiletries, cleaning supplies, etc.  (I found extra toothpaste, q-tips, deodorant, cotton balls, shower curtain liners just from reorganizing this closet!!) So, Sunday morning I decided to take on the organization project. To make sure I didn't have to spend any money on this I made sure to use baskets and supplies we already had in the house.  

I started by emptying the entire closet and putting everything in a larger room so I had space to spread everything out.  


I organized everything by category and assigned a basket to each category.  Ours are: 
  • Towels
  • Toilet paper & tissue
  • Toiletries
  • Medicine
  • Hand towels & wash cloths 
  • Cleaning supplies & filters
  • Nail polish
  • Travel organizers & toiletries

I made the labels using the following supplies: (1) avery 2" inch circle labels (on hand from labelling bottles of homemade vanilla extract), (2) scrapbook paper and (3) different ribbons.  Design your label using avery templates (just type in the product number -http://www.avery.com/avery/en_us/Templates-%26-Software/Templates/?Ns=Rank - its free!) and print.  Stick each label to scrapbook paper, make a small hole and thread ribbon through.  Attach each label to its respective basket. 

If you do not have labels in the house, you can use regular paper and tape to scrapbook paper. 


I already had two large and two medium baskets in the bathroom.  The other four baskets are left over gift baskets we used for Christmas gifts.  They don't match perfectly, but hey, they are better than the white plastic baskets I had before and I didn't have to go out and buy them! 

I also used ball quart & pint sized jars to hold cotton balls and q-tips.  I hot glued ribbon around the mouth of the jars. 

We are very happy with how the bathroom closet turned out.  It is much easier to find what you are looking for and it is clear where everything belongs!!  


                                                       Before                                  After